CMPU 125 Lab 2 - September 19th, 2008
In this lab, you will
- practice using command-line arguments in a program,
- practice writing while and for loops, including the new enhanced for loop, and
- modify a program to include a JButton from javax.swing to exit (if time permits).
Part 1:
Download RevPolish.java file
- Log in to your Vassar CS account by typing your username and password
at the login window.
- In the cs125 directory on your Desktop (or in a place of your own choosing), make a new directory for lab 2 by entering:
mkdir lab2
- Change to the directory you made in the last step by entering:
cd lab2
- Open a web browser.
- Open the course web page by going to url
www.cs.vassar.edu/~cs125
Download the file RevPolish.java into your cs125/lab2 directory.
If you use the rightmost mouse button while pointing at the
RevPolish.java link, you can choose the option of saving the file.
This program is intended to be the basis for a very
simple "reverse Polish"
calculator (so-called because the operands are entered before the
operator). Reverse Polish notation (or just RPN) by analogy with the
related Polish notation, a prefix notation introduced in 1920 by the
Polish mathematician Jan Lukasiewicz, is a mathematical notation
wherein every operator follows all of its operands. It is also known as
Postfix notation and is parenthesis-free.
-
Compile the RevPolish.java file in the Console window by typing javac
RevPolish.java at the command line (or by pressing the Compile button inside DrJava).
The file should compile with no errors.
Run the file by typing java RevPolish 3 4 at the command
line or in the DrJava interactions pane. The file should output the line 3 + 4 = 7 to
the standard output (the screen).
- To
edit the RevPolish.java file, open it in the editor or IDE of your
choice (e.g., DrJava, NetBeans, emacs,...) You may want to seek
help from your coach or professor if using NetBeans. In its
present form, the file
takes two operands as command line arguments args[0] and args[1],
converts
the strings to integers and then adds the numbers, printing the result
to the screen.
Create a reverse Polish calculator
Augment the RevPolish.java file so that it takes a third argument from the
command line. This argument (args[2]) will be one of the following
arithmetic operators:
+ - * / %
When finished, your program should read three arguments from the
command
line, determine the correct operation to perform on the two
integers, perform the operation, and produce the result. An example
session from running the program would appear as follows (the ">" is
the prompt from either the command line or the DrJava interactions pane
and the bolded text is what the user types to run the program):
      > java RevPolish 3 67 +

      > 3 + 67 = 70

      > java RevPolish 8  2 *

      > 8 * 2 = 4

      > java RevPolish 23  3 %

      > 23 % 3 = 2
Part 2:
Your task
Download the file LoopDeeLoop.java, that contains starter code for the following:
- A constructor with no arguments:
public LoopDeeLoop()
- A private method for each exercise listed below, exercise1...exercise4.
exercise1 through exercise4 should call private helper methods.
- A private method with no arguments:
private String dashLine()
// Constructs and returns a String composed of 50 to 80 dashes
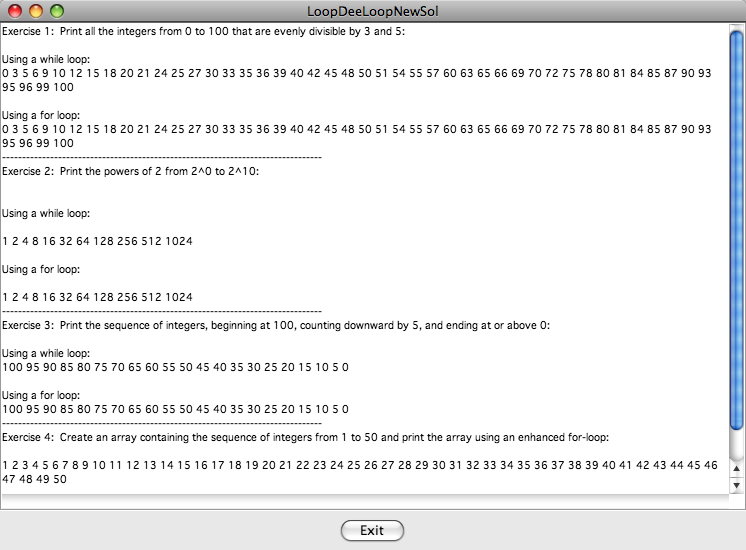
Fill in the method bodies to perform each of the following functions using both while and for loops:
- Print all integers from 0...100 that are both evenly divisible by 3 and 5.
- Print the first 10 powers of 2 (be sure these are printed as integers.)
- Print the sequence of integers, beginning at 100, counting
downward by 5 ([100, 95, 90,85, ...]), and ending at or above 0.
- Create an array of integers and use the enhanced for loop-to print its elements.
- Call the dashLine() method before and after each of exercises 1 through 4.
The output from your program should look like the window shown below:
Part 3:
If
time permits, your professor will walk you through adding a JButton to
the LoopDeLoop program to exit the window. The steps to do this
are given below:
- Import the packages javax.swing, java.awt.event, and acm.graphics.
- Declare a private JButton instance variable.
- Add a public void method called init that takes no parameters and contains the code to
- instantiate the JButton object with label "Exit"
- add the JButton to the SOUTH border of the window
- add action listeners
- Add an actionPerformed method with definition public void actionPerformed(ActionEvent e) that contains the single statement
System.exit(0);
This line causes the system to exit the window.
Following the steps above should result in a bar at the bottom of the window that looks like the one shown above.
After the Lab
Don't forget to log out.